
Import and Export rclone Configurations
Safely backup all your connected storages into an encrypted archive with native rclone encryption and restore it on any machine in one click.
Step-by-step walkthrough:
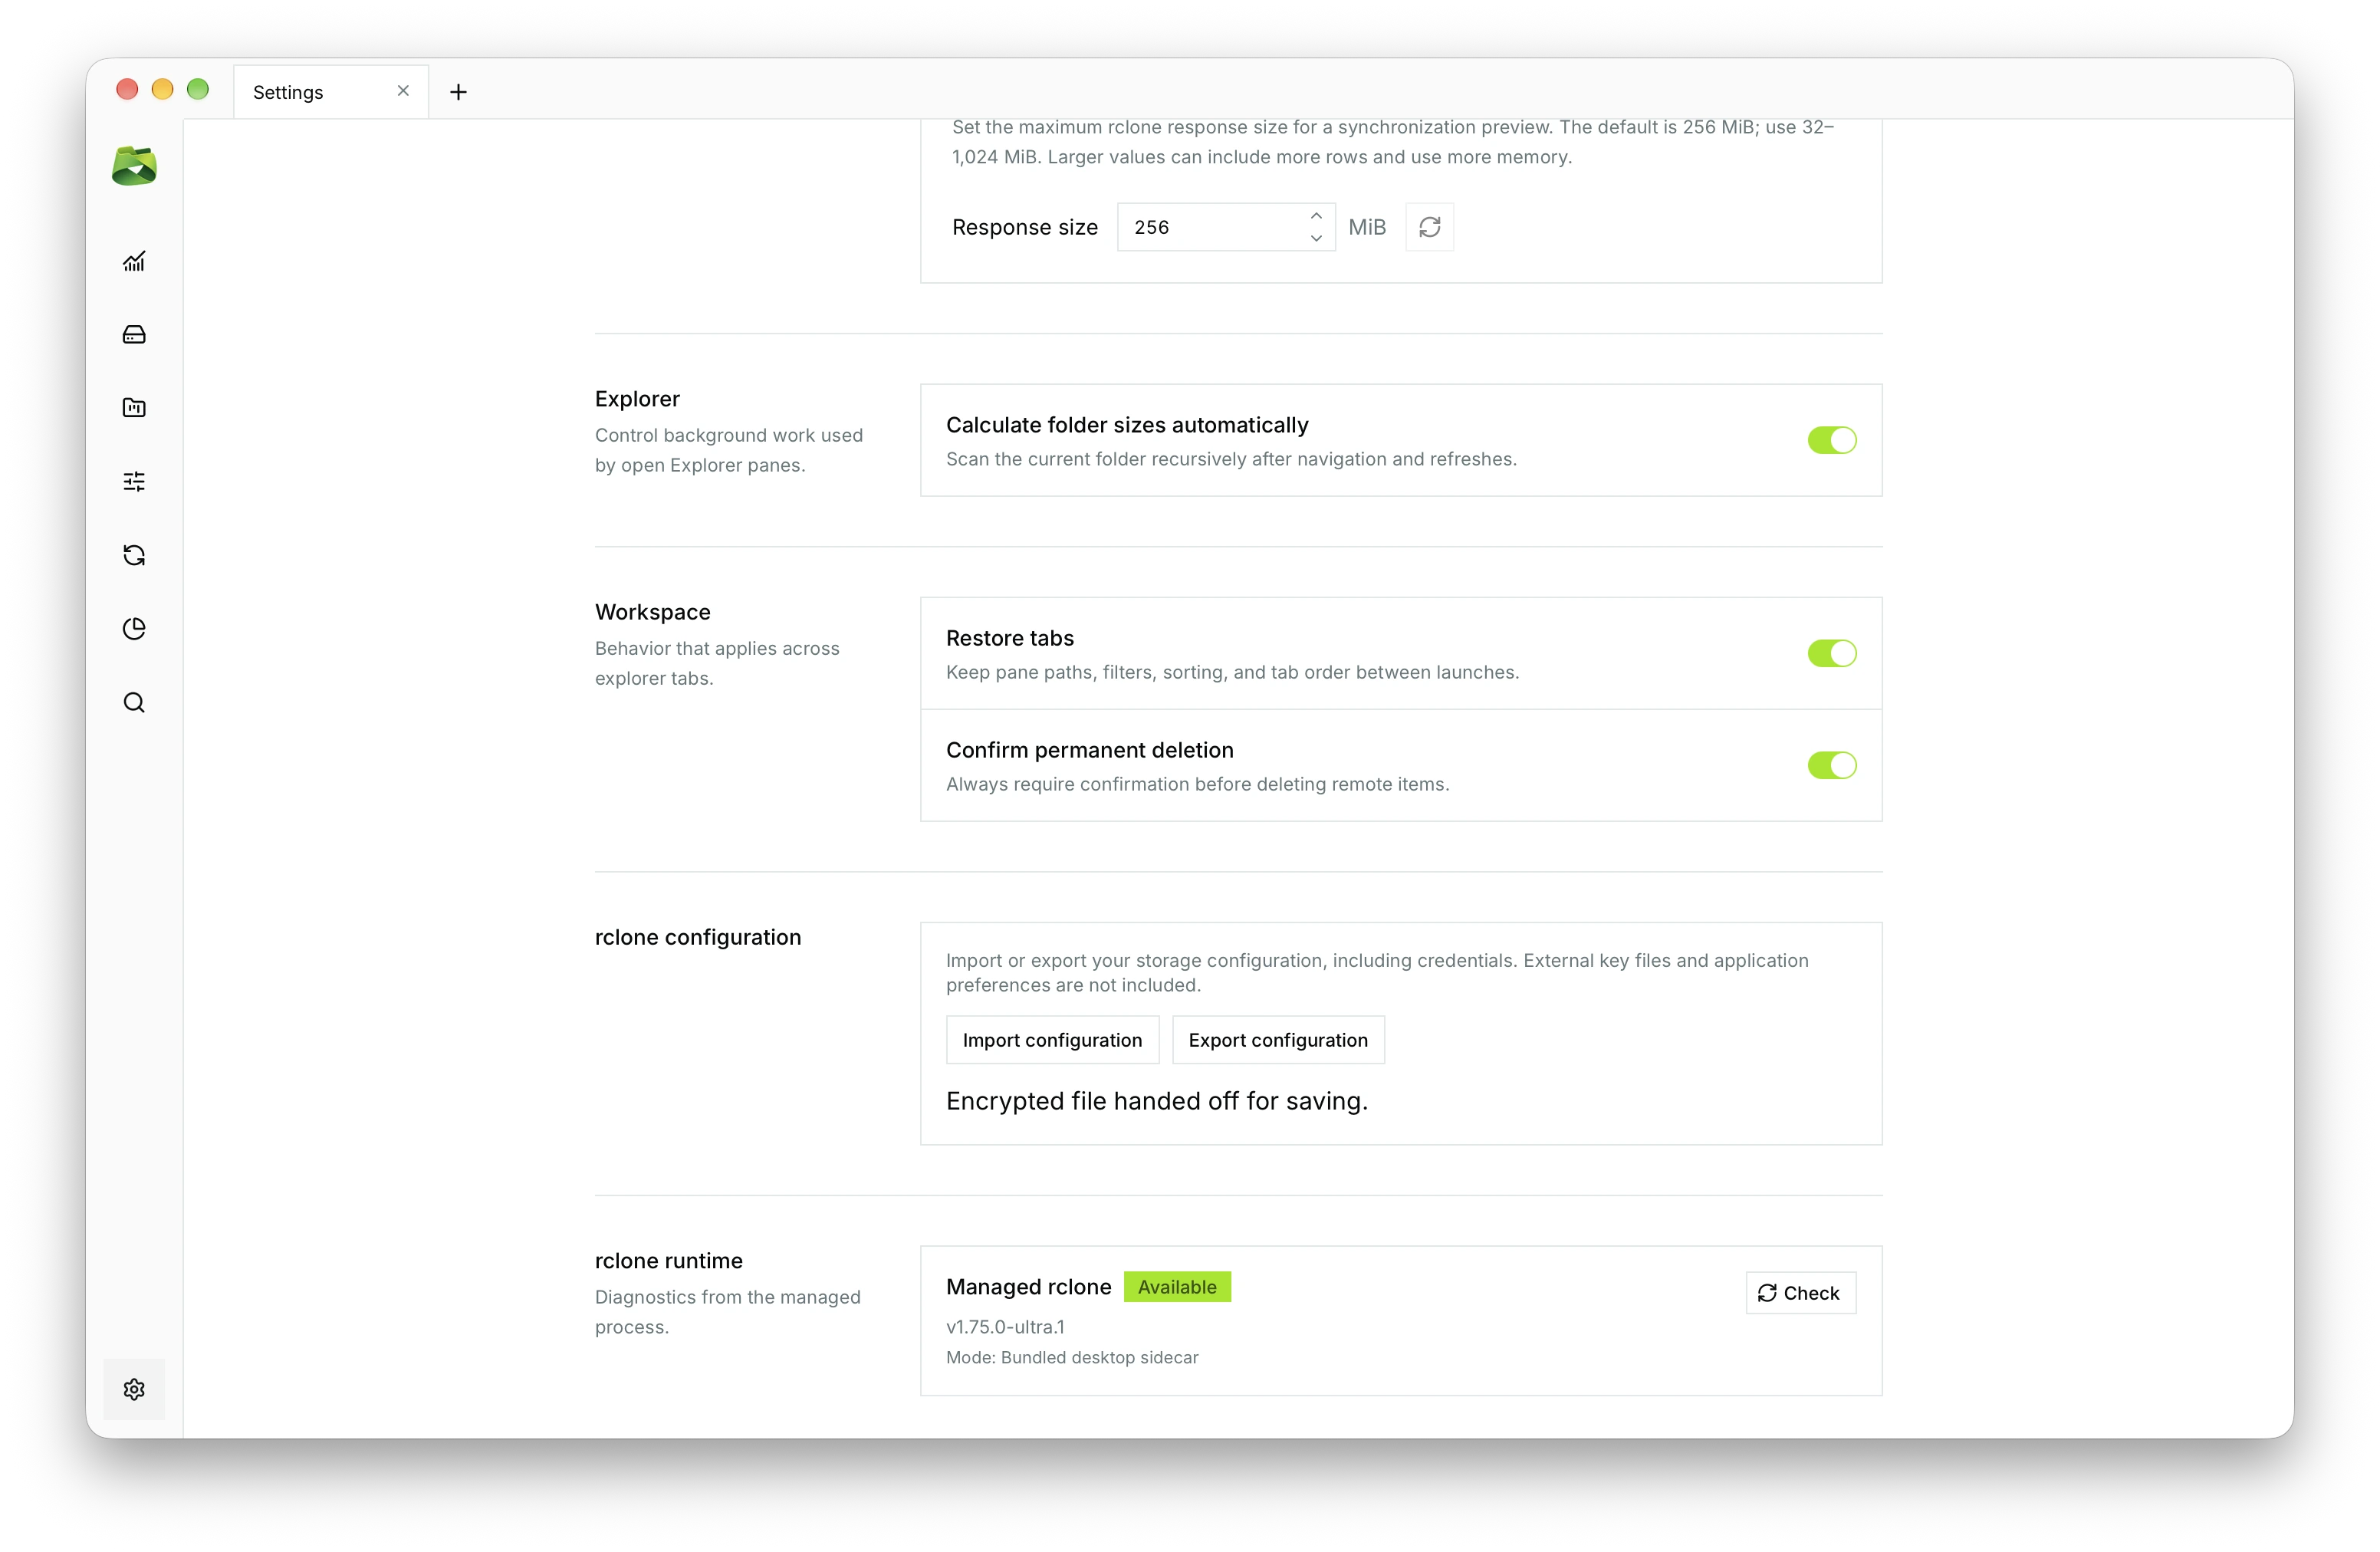
Navigate to "rclone configuration" in Settings
Open Preferences by clicking the gear icon at the bottom of the left sidebar. Scroll down to the "rclone configuration" card. This section houses the "Import configuration" and "Export configuration" controls, along with the bundled rclone runtime status.
rclone configuration section in Ultra Explorer Settings.
Trigger export and define a strong encryption password
Click "Export configuration". An export modal opens. To ensure strict data sovereignty, your credentials and cloud tokens are encrypted with native rclone algorithms. Provide a master password of at least 12 characters (up to 1,024 UTF-8 bytes) or click "Generate password" for an unbreakable random key.
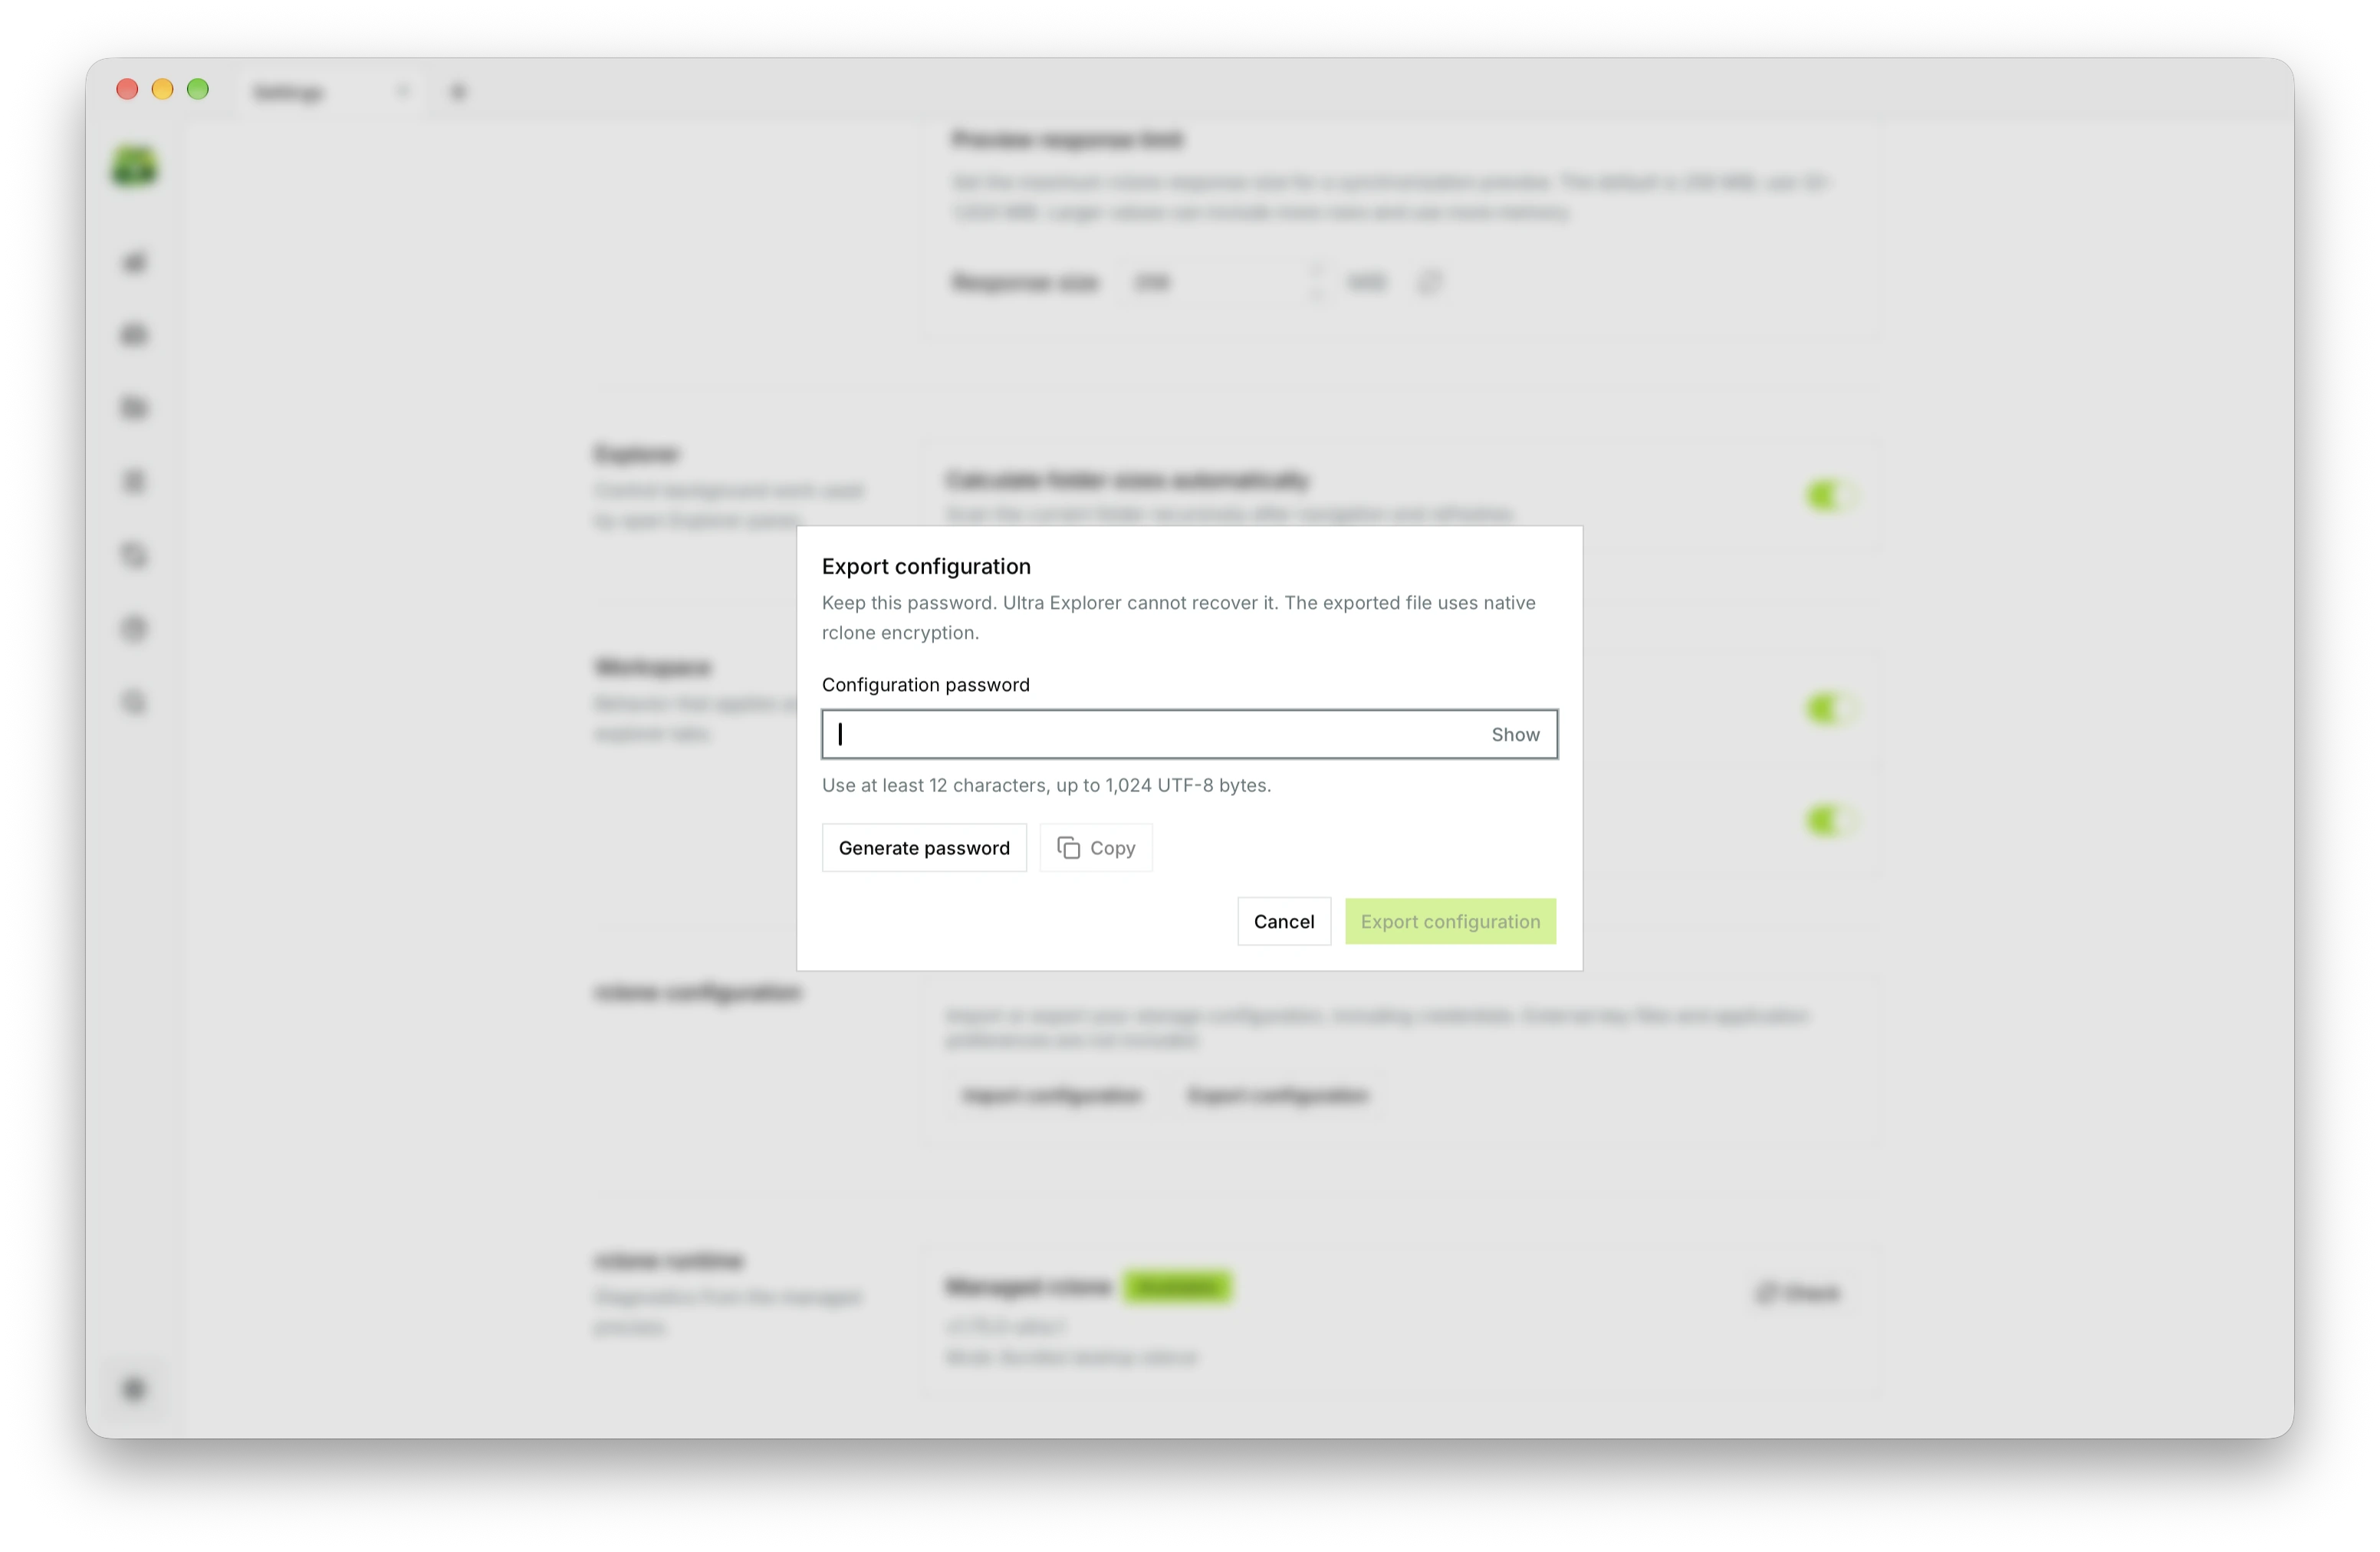
Encrypted configuration export dialog with password generator and copy helper.
Save the encrypted file and store the password
Click the green "Export configuration" button and pick a secure folder on your disk or backup drive. Crucial note: Save your password in your password manager (Bitwarden, 1Password, etc.). Ultra Explorer does not store master keys and cannot recover them if lost.
Import configuration on a new device with pre-flight preview
On your new device or after reinstalling, open Settings > rclone configuration and click "Import configuration". Click "Choose File" and select your exported configuration file. Ultra Explorer immediately analyzes the file and reveals an inventory comparison: visible storages before versus after replacement, along with the full list of detected remotes (Google Drive, OneDrive, S3, SMB, etc.).
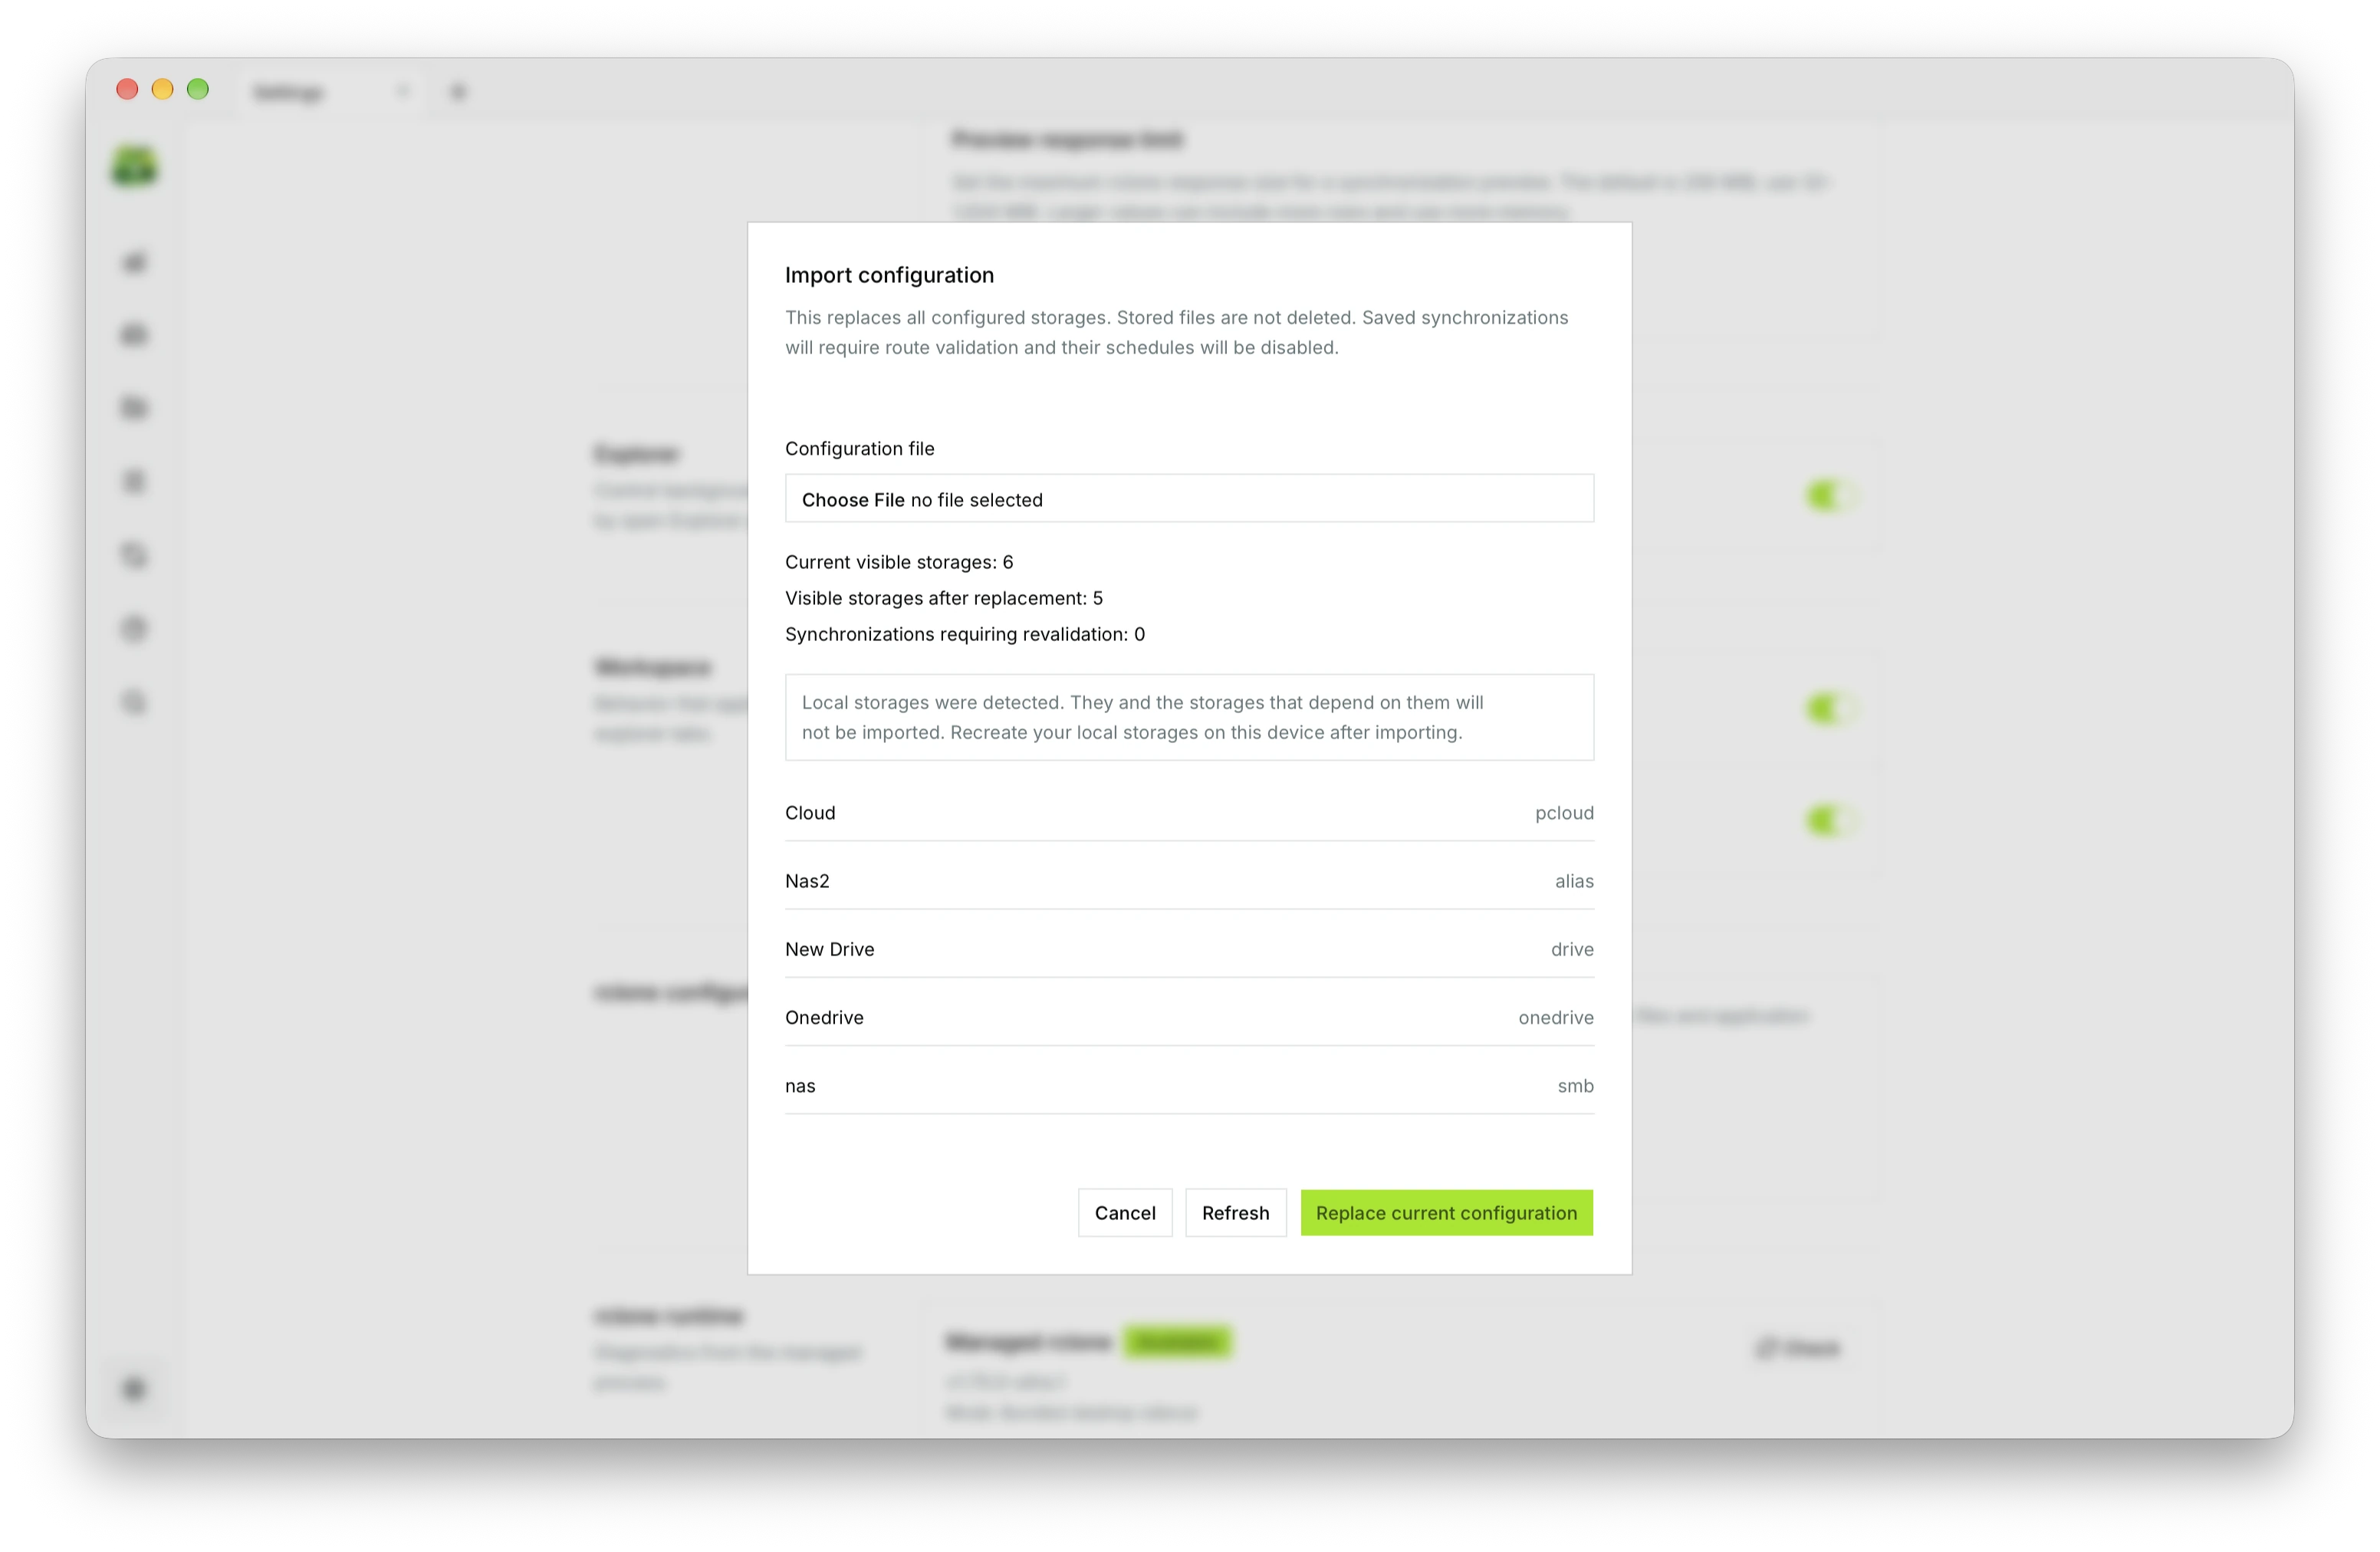
Pre-flight storage comparison and remote inventory preview before replacement.
Confirm replacement and access your storages immediately
Verify the storage list and click the green "Replace current configuration" button. All your remotes are immediately loaded into Ultra Explorer and ready for use in the Dual-Pane Explorer without an app restart. If you have saved synchronization jobs, re-open them to validate routes before reenabling schedules.